GOOGLE WEBMASTER GUIDELINES - STARTER GUIDE -SEARCH CONSOLE
GOOGLE WEBMASTER
Google Webmaster is a tool which is a free service that helps you evaluate and maintain your website's performance in search results (1). Offered as a free service to anyone who owns a website, Google Webmaster Tools (GWT) is a conduit of information from the largest search engine in the world to you, offering insights into how it sees your website and helping you uncover issues that need fixing.
How GWT can help monitor your website's performance-
1. It verifies that Google can access the content on your website.
2. GWT makes it possible to submit new pages and posts for Google to crawl and remove content you don't want search engine users to discover.
3. It helps you deliver and evaluate content that offers users a more visual experience.
4. You can maintain your website without disrupting its presence in search results.
5. It allows you to discover and eliminate malware or spam problems that may not be easily found through other means.
How GWT helps you understand how Google search views your website-
1. It tells you the most popular queries causing your website to appear in search results.
2. It tells you which queries are driving the most traffic.
3. You can see which websites are linking to yours.
4. You can evaluate how well your mobile website is performing for people searching on tablets and phones.
2. It tells you which queries are driving the most traffic.
3. You can see which websites are linking to yours.
4. You can evaluate how well your mobile website is performing for people searching on tablets and phones.
How to set up GWT-
Before accessing any data, you have to verify that you are the owner, or authorized representative, of the website. There are five ways you can verify your website. One is not really better than the other, so you can choose which option is the easiest for you.
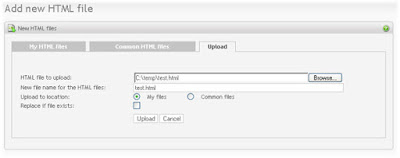
> Uploading an HTML file - Google gives you a file with a specific name that you have to upload to the root directory of your website. The file itself is blank. Its only purpose is to help prove that you have access to the website's FTP server and can drop files where they need to go. Once the file goes into the root directory, just click on the "verify" button in GWT, and you will have access to data.
>Adding an HTML tag - You can also verify the website by adding a meta tag provided by Google that you can drop into the header of your homepage. Once this is in place, click on the "verify" button to view data. It's important to note that sometimes homepage code can be challenging to find with certain content management system (CMS) themes, particularly WordPress. It is also possible that your code might disappear when you update your homepage, revoking your access to GWT data until the tag is replaced.
>Select the provider of your domain - Google gives you the option of selecting your domain name provider in a drop-down list. Click on your provider, and Google will walk you through the steps of verifying your website.
>Use Google Analytics - As the administrator of your website's Google Analytics account, you can verify the website using asynchronous tracking code placed in the head of your homepage.
>Using Google Tag Manager - this is a tool that allows you to enter and manage all the tracking tags for your website, including GWT.
Once your account is set up and your website is verified, you will have access to plenty of actionable data that can help you optimize your website. You can receive alerts from Google, adjust settings to deliver specific information to your inbox, submit XML site maps and view user queries where your website appeared in search. Learn the basics of using GWT, and you will have a great resource on which to base your future marketing decisions.
I hope this will help you.
Kindly Share- https://www.facebook.com/chandan.yoyo.7


SEO Company in India
ReplyDeleteSEO Company in Mumbai
ORM Company India
Digital Marketing Company India
Seo Services in Dombivli
ReplyDeleteSeo Services in kalyan
Seo Services in panvel
Seo Services in palava
Seo Services in Ambernath
Seo Services in kalwa
Seo Services in Navi Mumbai
Seo Services in Mumbai
Seo Services in Kurla
Seo Services in matunga
Seo Services in Powai
Seo Services in Titwala
Seo Services in Sanpada
Seo Services in Vikhroli
Seo Services in Dadar
Seo Services in Diva
Seo Services in Bandra
Seo Services in Andheri
Seo Services in Vashi
Seo Services in Bhiwandi
Seo Services in byculla
Seo Services in bhayandar
Seo Services in badlapur
Seo Services in Ambivli
Seo Services in Airoli
Seo Services in Ambernath
Seo Services in Asangaon
I wanted to thank you for this great read. Your blog is one of the finest blog . Thanks for posting this informative article.
ReplyDeleteDigital Marketing in tirupati